Showing posts with label Dessert Recipes. Show all posts

Wednesday, August 24, 2011

The Ultimate "Peachy Summer" dessert


When peaches can be found at Farmers Market, and a cool breeze can be felt at night; I know fall is just around the corner. And with that, the urge and need to enjoy as much as we can of those sticky summer days begin.

I leave you with this lovely and lig
ht dessert perfect to enjoy on these last sunny summer afternoons. Each bite will taste as the summer warmth we are about to leave behind....

Peach Tart with Orange Syrup


Ingredients:
3 peaches halved, stones removed

1/4 cup of sugar

90g butter, softened

1/2 cup extra sugar

1 cup ground almonds

1/4 cup all purpose flour

2 tsp lemon rind

1/4 tsp baking powder


Orange Syrup


1 cup fresh orange juice

1/4 cup orange liqueur

1/2 cup of sugar


Directions:

For the orange Syrup place all ingredients in a saucepan over high heat and bring to a boil. Reduce the heat to low and simmer 12
mins. or until thick. Set aside to cool.

Heat a non-stick frying pan over med
ium heat. Combine the peach halves with sugar and cook cut side down until the sugar is melted and golden. Set aside. Preheat oven to 320F. Place butter and extra sugar in food processor and combine, add eggs, almond meal, flour, lemon rind and baking powder and process until just combined. Place almond mixture in a 12x35 cm rectangular dish or loose bottom tart tin. Press nectarines into the mixture and bake for 30 mins. or until cooked through. Allow to cool and serve with orange syrup.


Monday, July 11, 2011

Raspberry Sorbet


Last weekend, even though strawberry season was over, I visited Andrew's Scenic Acres hoping there would be some left. I was really disappointed to see that there were barely any strawberries left, until I saw a girl leaving with a big basket of RASPBERRIES. I could get some berries after all!. It was the perfect day for raspberry picking, cloudy but nicely warm and humid, just the perfect day of summer!...


Raspberry Sorbet came to mind as I kept picking all the fresh berries! 


Raspberry Sorbet
200 g of sugar
180 ml water
750 ml red wine
400 g raspberries
Bring to a boil the sugar, water and wine in order to burn the alcohol from the wine. Let boil for over a min, then remove from the heat, add the raspberries and cover. Let it sit for 1 hour, strain the mixture to get rid of all the little seeds and refrigerate until completely chilled.


Freeze in an ice cream maker as instructed by the manufacturer and ENJOY!

Sunday, March 27, 2011

A different Rhubarb recipe!

As we are heading into spring time, I couldn't help but notice all the beautiful rhubarbs at my produce shop. I've never tried rhubarb before, so I didn't really know what the flavour would be or what to expect, but I knew I wanted to cook it in a unique way, so... I started thinking of ways to use it. I wanted to make some sweet tamales and thought that a nice rhubarb filling would be a great idea, and I was right, the taste was amazing! So I was really glad that my new creation actually went really well. I guess I was in a creative mood and really just went with it!.. I'll do this more often!


Rhubarb Sweet tamales


Ingredients:

For the Rhubarb filling:

3 rhubarbs cut into 1 inch chunks
1/3 cup sugar
1 vanilla bean

Tamales:

2 cups of natural corn flour "Minsa Tamales" brand
1 cup of water
1 cup of sweet and condensed milk
1 tsp baking powder
1/2 tsp salt
1/2 cup butter

12 cornhusks previously boiled

Directions:

For the filling, place the rhubarb chunks with the sugar and vanilla bean seeds over medium heat, put the lid on and stir the rhubarb once every 5 mins for approx 15 mins until you get a thick marmalade consistency. Meanwhile prepare the tamales dough. First beat the butter until light and fluffy. In a separate bowl combine the corn flour, baking powder and salt. Add the water and sweet & condensed milk until thick. Add the thick batter to the butter and beat until everything is well combined.

To asemble, put a spoonful of the batter into the previously boiled corn husks (this make them soft and manageable). Spread the batter with your spoon in the middle of the corn husk, then add a teaspoon of the filling and wrap it to avoid the filling or the tamale batter to spread out. Steam the tamales in a deep pot for almost 1 hour or until the batter is set. You can eat them at this point or if you want for them to be more set you can let them cool in the fridge and reheat them later. ENJOY!


And if you want to kick it up a nodge, you can serve your tamales with a delicious, hot, silky and sweet atole.. believe me, on a weather like today where I am seeing just outside my window a weird mix of icy rain.... it is a great treat!

Sunday, February 20, 2011

Tuesday, October 5, 2010

My Own Bday Treats

A few weeks ago was my Bday, and I thought that it was the perfect excuse to indulge myself.. hahahaha yes, I decided I was going to give myself some pretty awesome little treats as a birthday present! I hope not to be the only one who bakes their own BDAY cake hahahahaha am I?.. Anyways, I was craving a really amazing dessert I found in one of the most beautiful blogs I follow.. Design*Sponge. I always found in there great DIY, design and cooking ideas! So after I saw this recipe from Ming Thompson I really knew I had found the perfect excuse to bake my own Bday cake .. or cupcakes; which I made just so I could take them with me!

I am a nutty person, so any type of recipes that include nuts, I am the first on the line to try! It was fun to make, and very very nice to have as a celebration of my 26th BDAY! Anyways, hope you also find these little pistachios as attractive as I did!..

Click here for the RECIPE

Wednesday, September 8, 2010

The last of summer - Sorbet Recipe!

Today I really felt winter coming! The wind was so chili, I actually had to take out one of my thick Fall sweaters! Although I think winter is in a way kind of magical, it's always hard to say good bye to summer, especially when you have farmer's markets all around you offering fresh fruits and vegetables at least once a week. I bought a couple of weeks ago some coronation grapes from my farmer's market, and they were amazing!! I know it took me a while to share with you this recipe, but here it is!! Sorbet is perfect for sunny days and might be a good thing to have around just in case we get hit with another heat wave which supposedly will be approaching us tomorrow!!


Grapes Sorbet

Ingredients:

3 cups of fresh grapes
2 1/2 tbsp of water
1/2 a cup plus 2 tbsp of simple syrup (1 part water, 1 part sugar slightly heated until sugar dissolves)

Directions:

Combine fruit and water in a bowl of food processor using the metal blade. Process until very smooth; pour through fine mesh strainer, pressing to get as much liquid as possible out of the fruit. Discard solids. Pour liquid into airtight container and refrigerate for at least 8 hours. Assemble your freeze bowl as directed. Mix the fruit juice and chilled simple syrup and pour into your freeze bowl as directed. (I have the kitchen aid ice cream bowl which is really easy to use, but if you have a manual ice cream maker just use it as directed).


mmmmmmmmmmmm!
That's all I have to say!

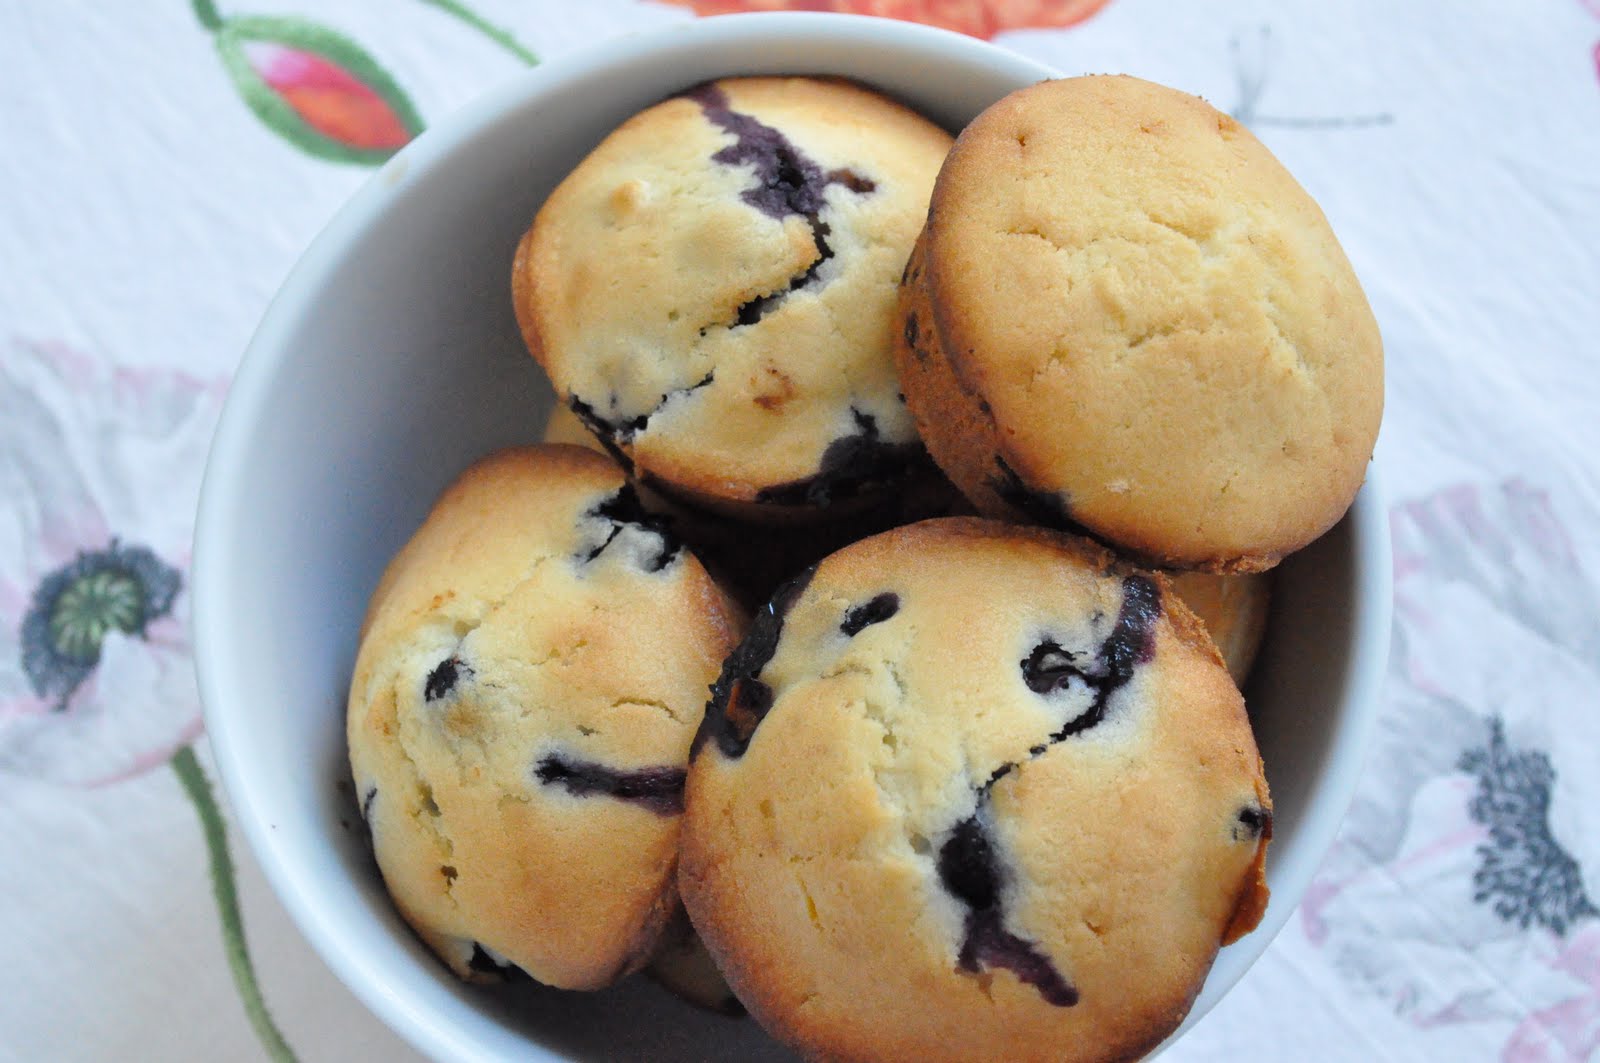
The perfect Blueberry Muffins!

Ohhh yes these muffins are Goooooooooood!.. Yes they are!! I always love trying new recipes, doesn't matter where they come from, but I challenge myself to try a new recipe every week. I sometimes don't have the time to try and make this fancy new meals, so for those times when I am busy and all, the only thing I ask for is to have a nice good tasting treat which will be easy to cook or bake and will give me what I am looking for... TASTE! I love using simple recipes, I've found that simple is for the most part better! And I just found this great recipe that fits into this category!.. Ohh yes! You all know I love sharing recipes and getting ideas from other foodies! So for this time I made this recipe from Smitten Kitchen, one of the blogs I love and follow meticulously!


By the time I was finished with this recipe, It had past 45 mins (baking and all) and I was enjoying one of the most fluffy muffins I've ever had!! Mmm each bite had a little sweetness from the bluberries.. and out of the oven, you just can refuse to try them.

To find this recipe please click below!


Thursday, August 12, 2010

Blueberry-Cherry Ice Cream

On these crazy hot summer days, there is nothing better than ice cream! Specially when you are able to make any type of flavour your heart and tummy desire!


Last week we went shopping, and even though I didn't plan for "snowman" to become part of the family, I couldn't resist any longer. Yes, snowman is my new ice cream maker! I am very glad to have it on my kitchen now! I don't know why I end up naming every gadget in my kitchen, maybe it is because that way I tend to care more for them as they become my little kitchen helpers! I have to admit they are an important part of my big love for cooking! Once I enter any cooking store, just forget about me, I could spend hours in there!


 I am sharing this lovely recipe with all of you who are obsessed with ice cream!
Enjoy each frosty bite!

Blueberry-Cherry Ice Cream

Ingredients:

2 cups fresh Cherries (pitted)
2 cups fresh Blueberries
Juice of 1/2 lemon
1/4 cup sugar
1 1/2 cups half-and-half
1 cup sugar
5 large egg yolks
1 1/2 cups heavy cream

Directions:

Add all the fruit to a medium saucepan with 1/4 cup sugar and lemon juice. Cook over low heat, covered, for 20 to 25 minutes. Drain using a fine mesh strainer, pressing fruit to extract as much juice/puree as possible. Set aside.

Heat half-and-half and 1 cup sugar in a separate saucepan over low heat. Turn off heat when mixture is totally heated.

Add heavy cream to a separate bowl.

Beat egg yolks with an electric mixer until yolks are pale yellow and slightly thick.

Temper the egg yolks by slowly drizzling in 1 1/2 cups of hot half-and-half mixture, whisking constantly. Then, pour the egg yolk/half-and-half mixture into the pan containing the rest of the half-and-half mixture. Cook over low to medium-low heat until quite thick. Stir constantly. Drain custard using a fine mesh strainer, then pour into the bowl with the cream. Mix it well.

Add fruit's juice/puree to the cream/custard mixture and stir. Chill mixture completely, before pouring it on your ice cream maker. Follow instructions on how to use it, and enjoy!

Friday, August 6, 2010

Apricot Cookies!!

Hey everyone! I know I have been silent for the past couple of weeks but I just had too many things on my check list, but I am still here, don't think I have abandoned you! One of the things I love about these food blogs is that you can share all sorts of recipes and experiences with other foodies like you, and get more passionate about cooking or baking!..


Last weekend I made these fantastic cookies from this cute blog I follow Love & Olive Oil. I've never tried to put fresh fruit into my cookie dough until I made this recipe. It was fantastic! I was overwhelm by the delicious combination of flavours! I just made a few changes to the recipe, I didn't add the instant coffee as I didn't have any, but it was super delicious anyways. You could really taste the Apricot flavour in the cookies. And another tiny little change I made was to sandwiched it with Vanilla Ice cream. Mmmmmm Delicious.

For all of you who are craving them right now, here is the link to the recipe!
Love & Olive Oil

Sunday, July 4, 2010

Maple Cream Tart

This beautiful and sunny long weekend we celebrated Canada Day, and not only that but one of my very very very good friend's birthday!.. Nice weather always invites you to BBQ, and Marisol wanted just that to celebrate her birthday! I wanted to cook something nice for my girl, so I thought a creamy maple tart will be just perfect for the occasion!! I wanted to try something new which can be tricky sometimes as I really didn't know how the flavour was going to be like. It was the first time I prepare this recipe and.. oh boy, it was really a nice maple goodness bite! I believe everyone enjoyed it or so they said! Hahahaha anyways, it was a light sweet dessert perfect to enjoy after such a big meal!

Maple Cream Tart

Ingredients:

375g ready rolled shortcrust pastry
filling
1 tbsp cornstarch
1 1/3 cups of cream
1/2 maple syrup
5 egg yolks

Directions:

Roll out the pastry on a lightly floured surface so it can cover a 9 inch pie shell. Blind bake the pastry. Meanwhile prepare the filling. Place the cornstarch in a bowl and whisk with a little of the cream until the mixture is smooth. Add the remaining cream, maple syrup, and egg yolks and whisk until combined. Pour the filling into the pastry and bake in a preheated 325F° oven for 30 to 35 mins. or until the filling is set. Chill until cold and set.

Delicious!